
Deleting or removing photos from your profile, group or post can be accomplished by following the directions below.
Please note, these actions will change depending on if you are visiting the website from your desktop computer or your phone or tablet.
Click here to jump down to see instructions for doing this on your Phone
From a Desktop Computer
Step 1 – Head to your Profile Photos
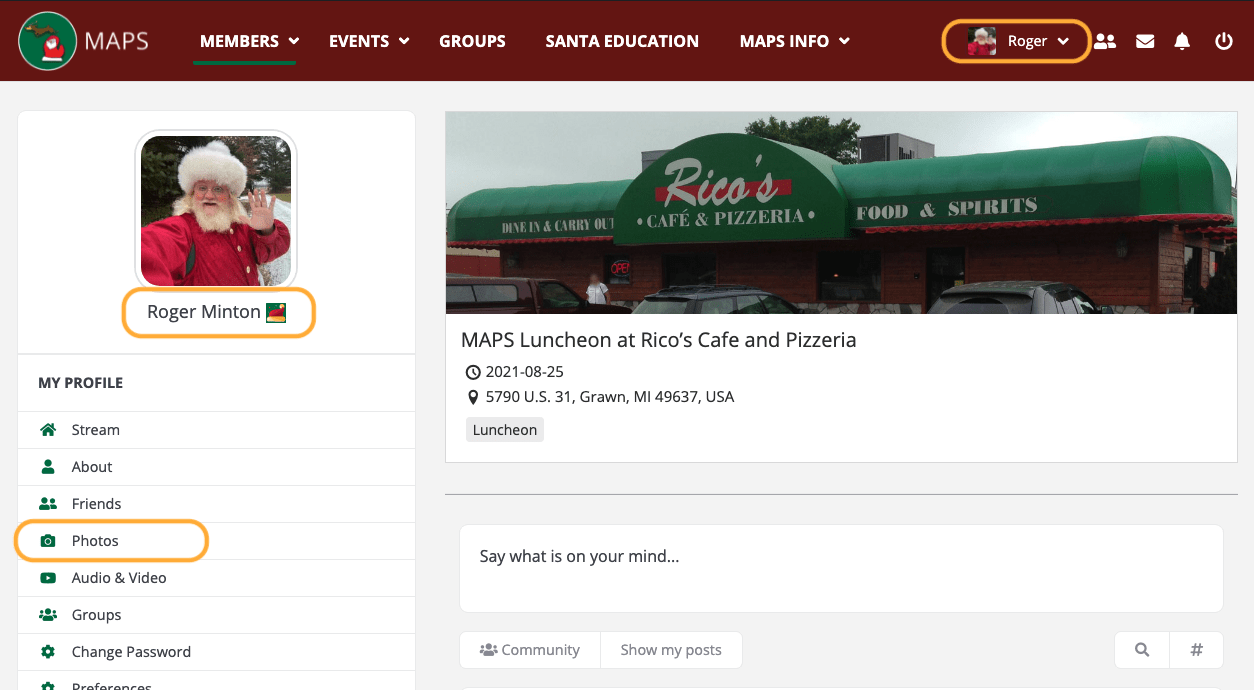
From the main page of the website you can click on a few different items to get to your profile photos. All of these options are outlined in ORANGE in the photo.
- On the left sidebar, you can click on your NAME under your profile photo
- Under your profile photo and name, there are several links, click on “Photos”
- In the Red Bar on the top of the website you can click the arrow next to your name and click on “Photos”
Step 2 – Find your Photos
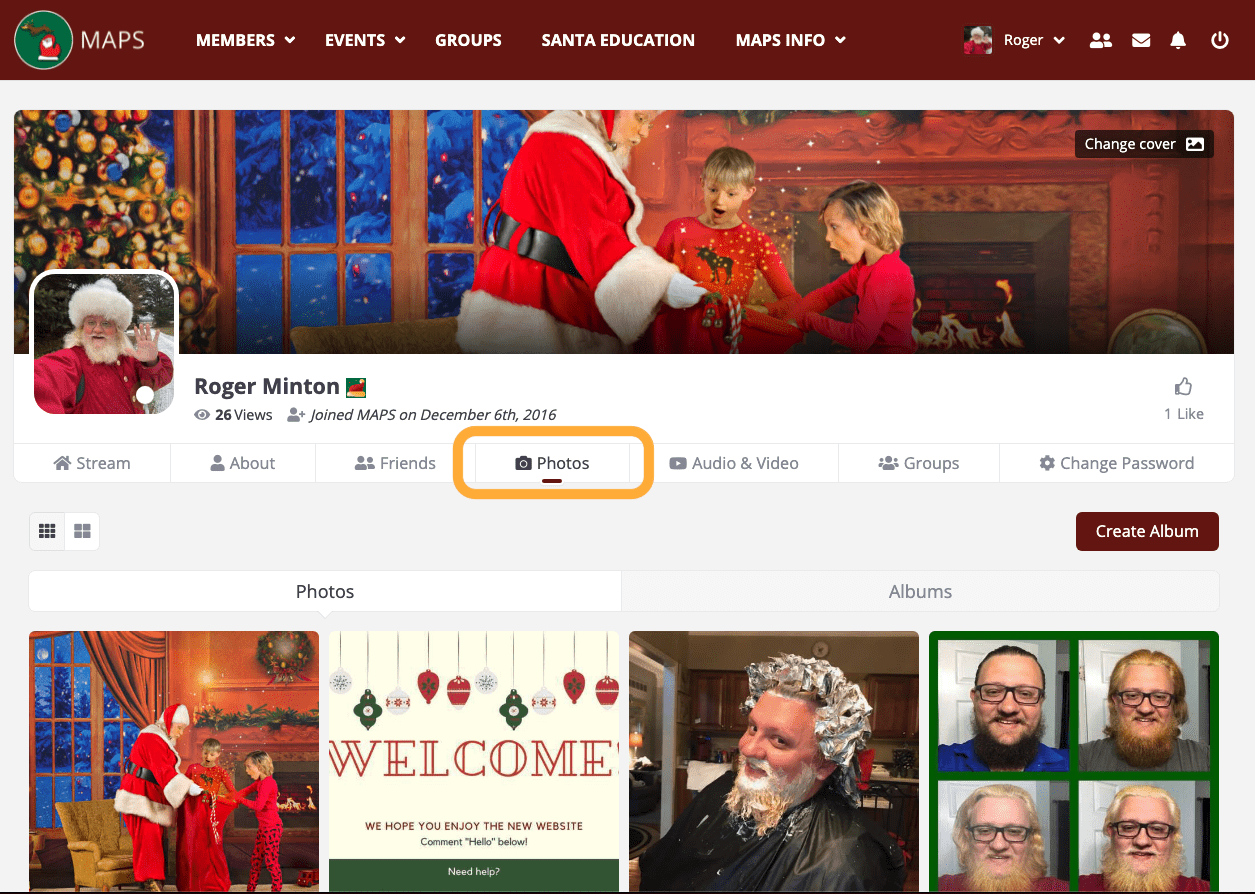
Navigate to your “Photos Tab” on your profile This link is outlined in ORANGE in the photo.
If you clicked your NAME from step one, you will be taken to your main profile, find the “Photos” link in the bar just below your name.
If you clicked the “Photos” link from step one, you will be taken to your photos tab.
Step 3 – Find your Photo
Once your photos have loaded you can scroll down to find the photo you wish to delete. When you hover over your photo with a mouse you will see a magnifying glass show up. You can then click the photo to view a larger version of the photo.

Step 4 – Access the edit menu on the photo
Find the Three Dots in the upper right hand corner of the image pop up (OUTLINED IN ORAGE). Click on those dots to access the edit menu.
From here you can click the “Delete” link (OUTLINED IN BLUE) to delete the photo.

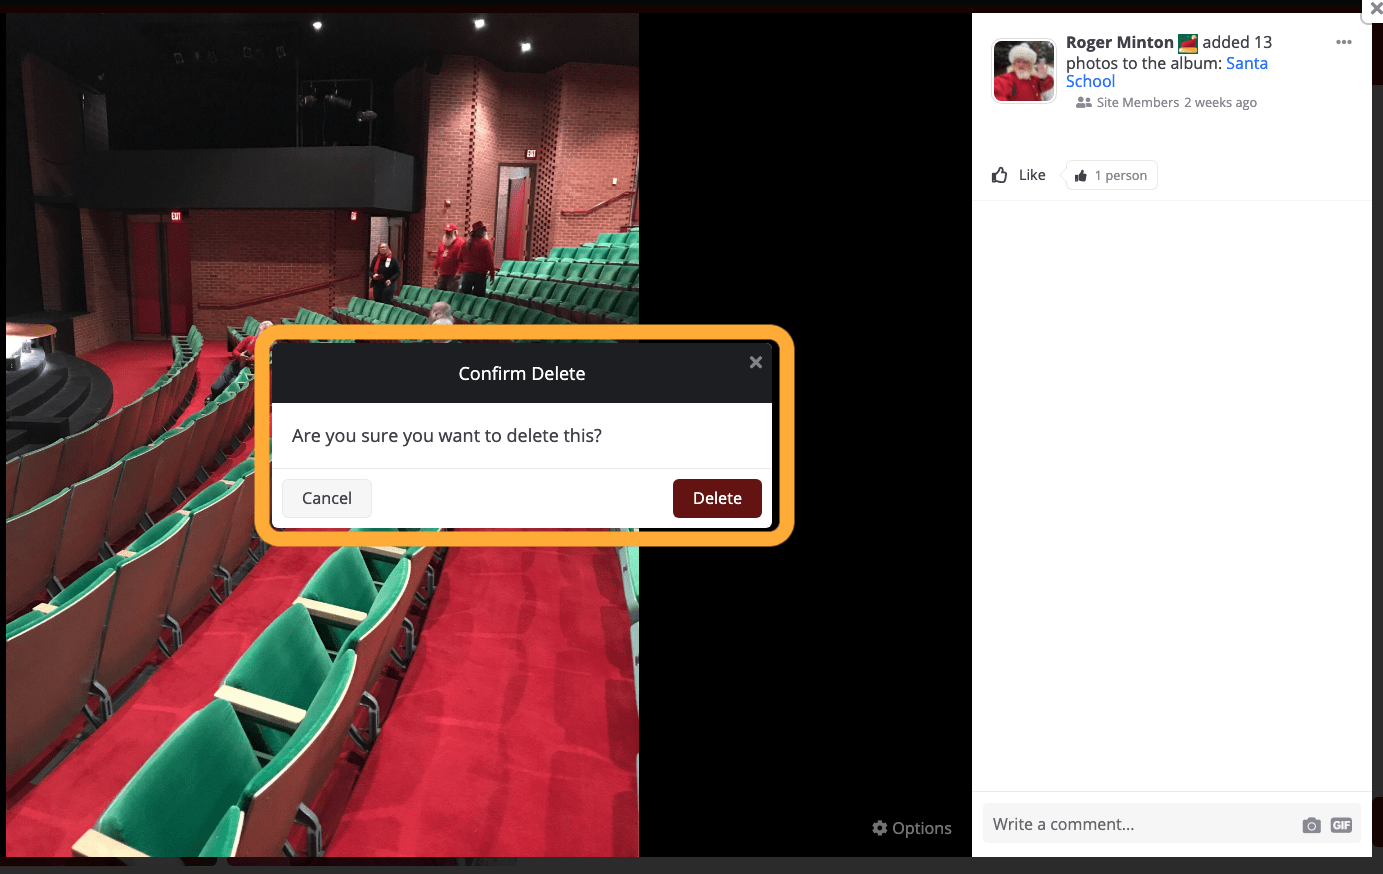
Step 5 – Confirm Deletion of the Photo
When you click delete link from the previous step, the system will ask you if you really want to delete the photo. Click Delete to delete the photo.
From a Phone
Step 1 – Head to your Profile Photos
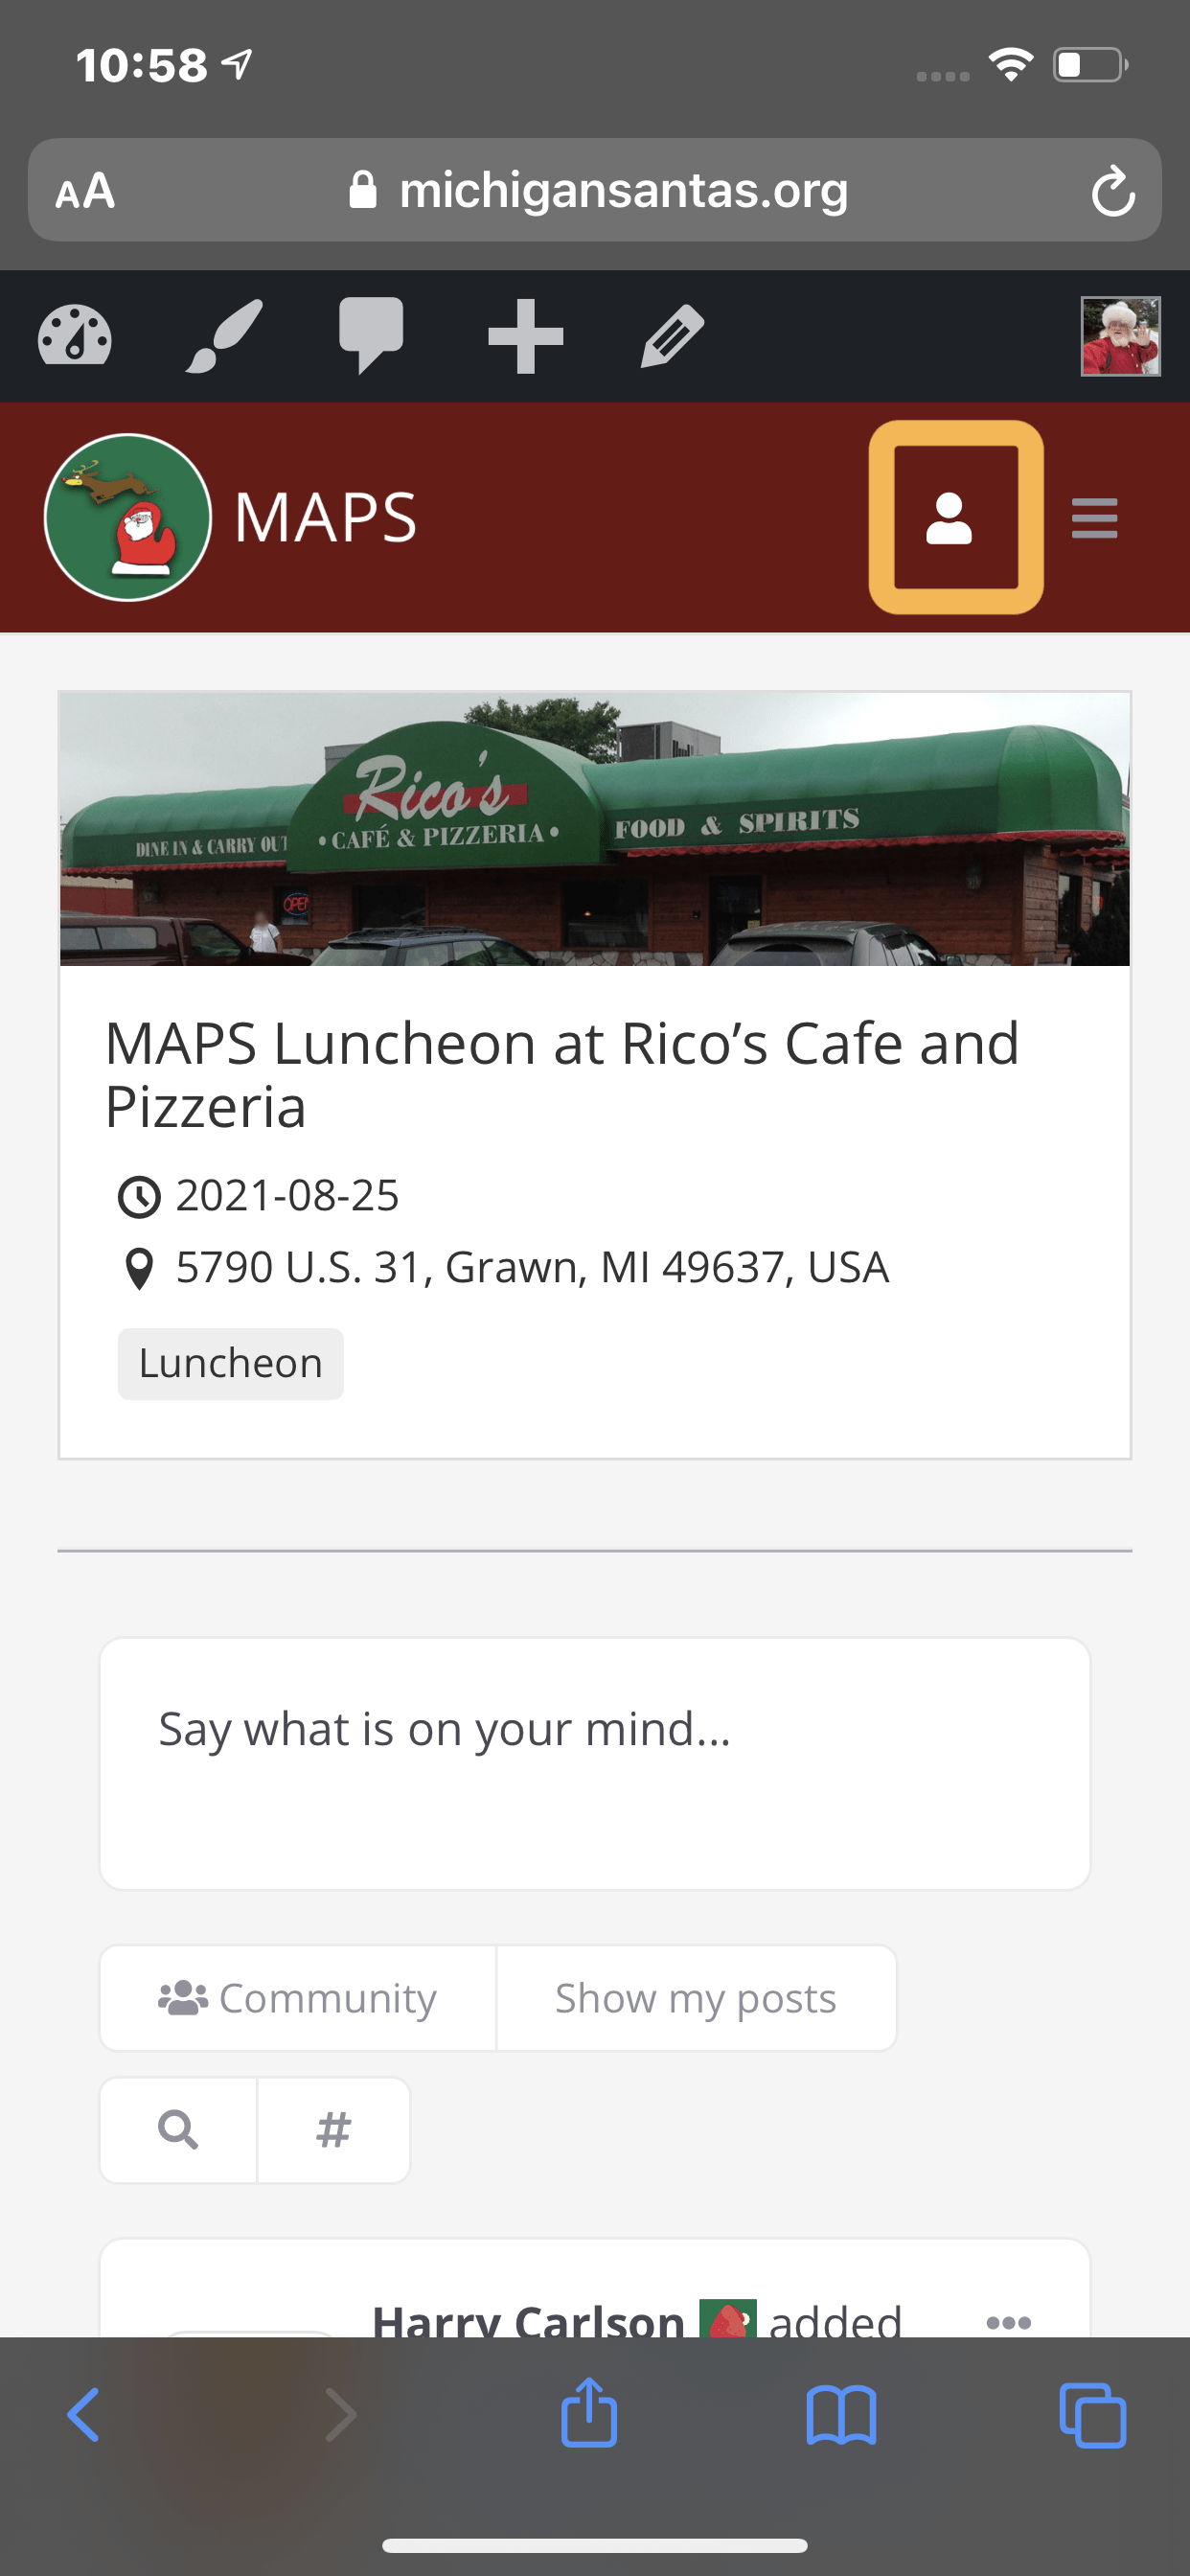
From the main page of the website, in the Red Bar on the top of the website you can tap the “User Icon” (OUTLINED IN ORANGE)
Step 2 – Open the User Submenu
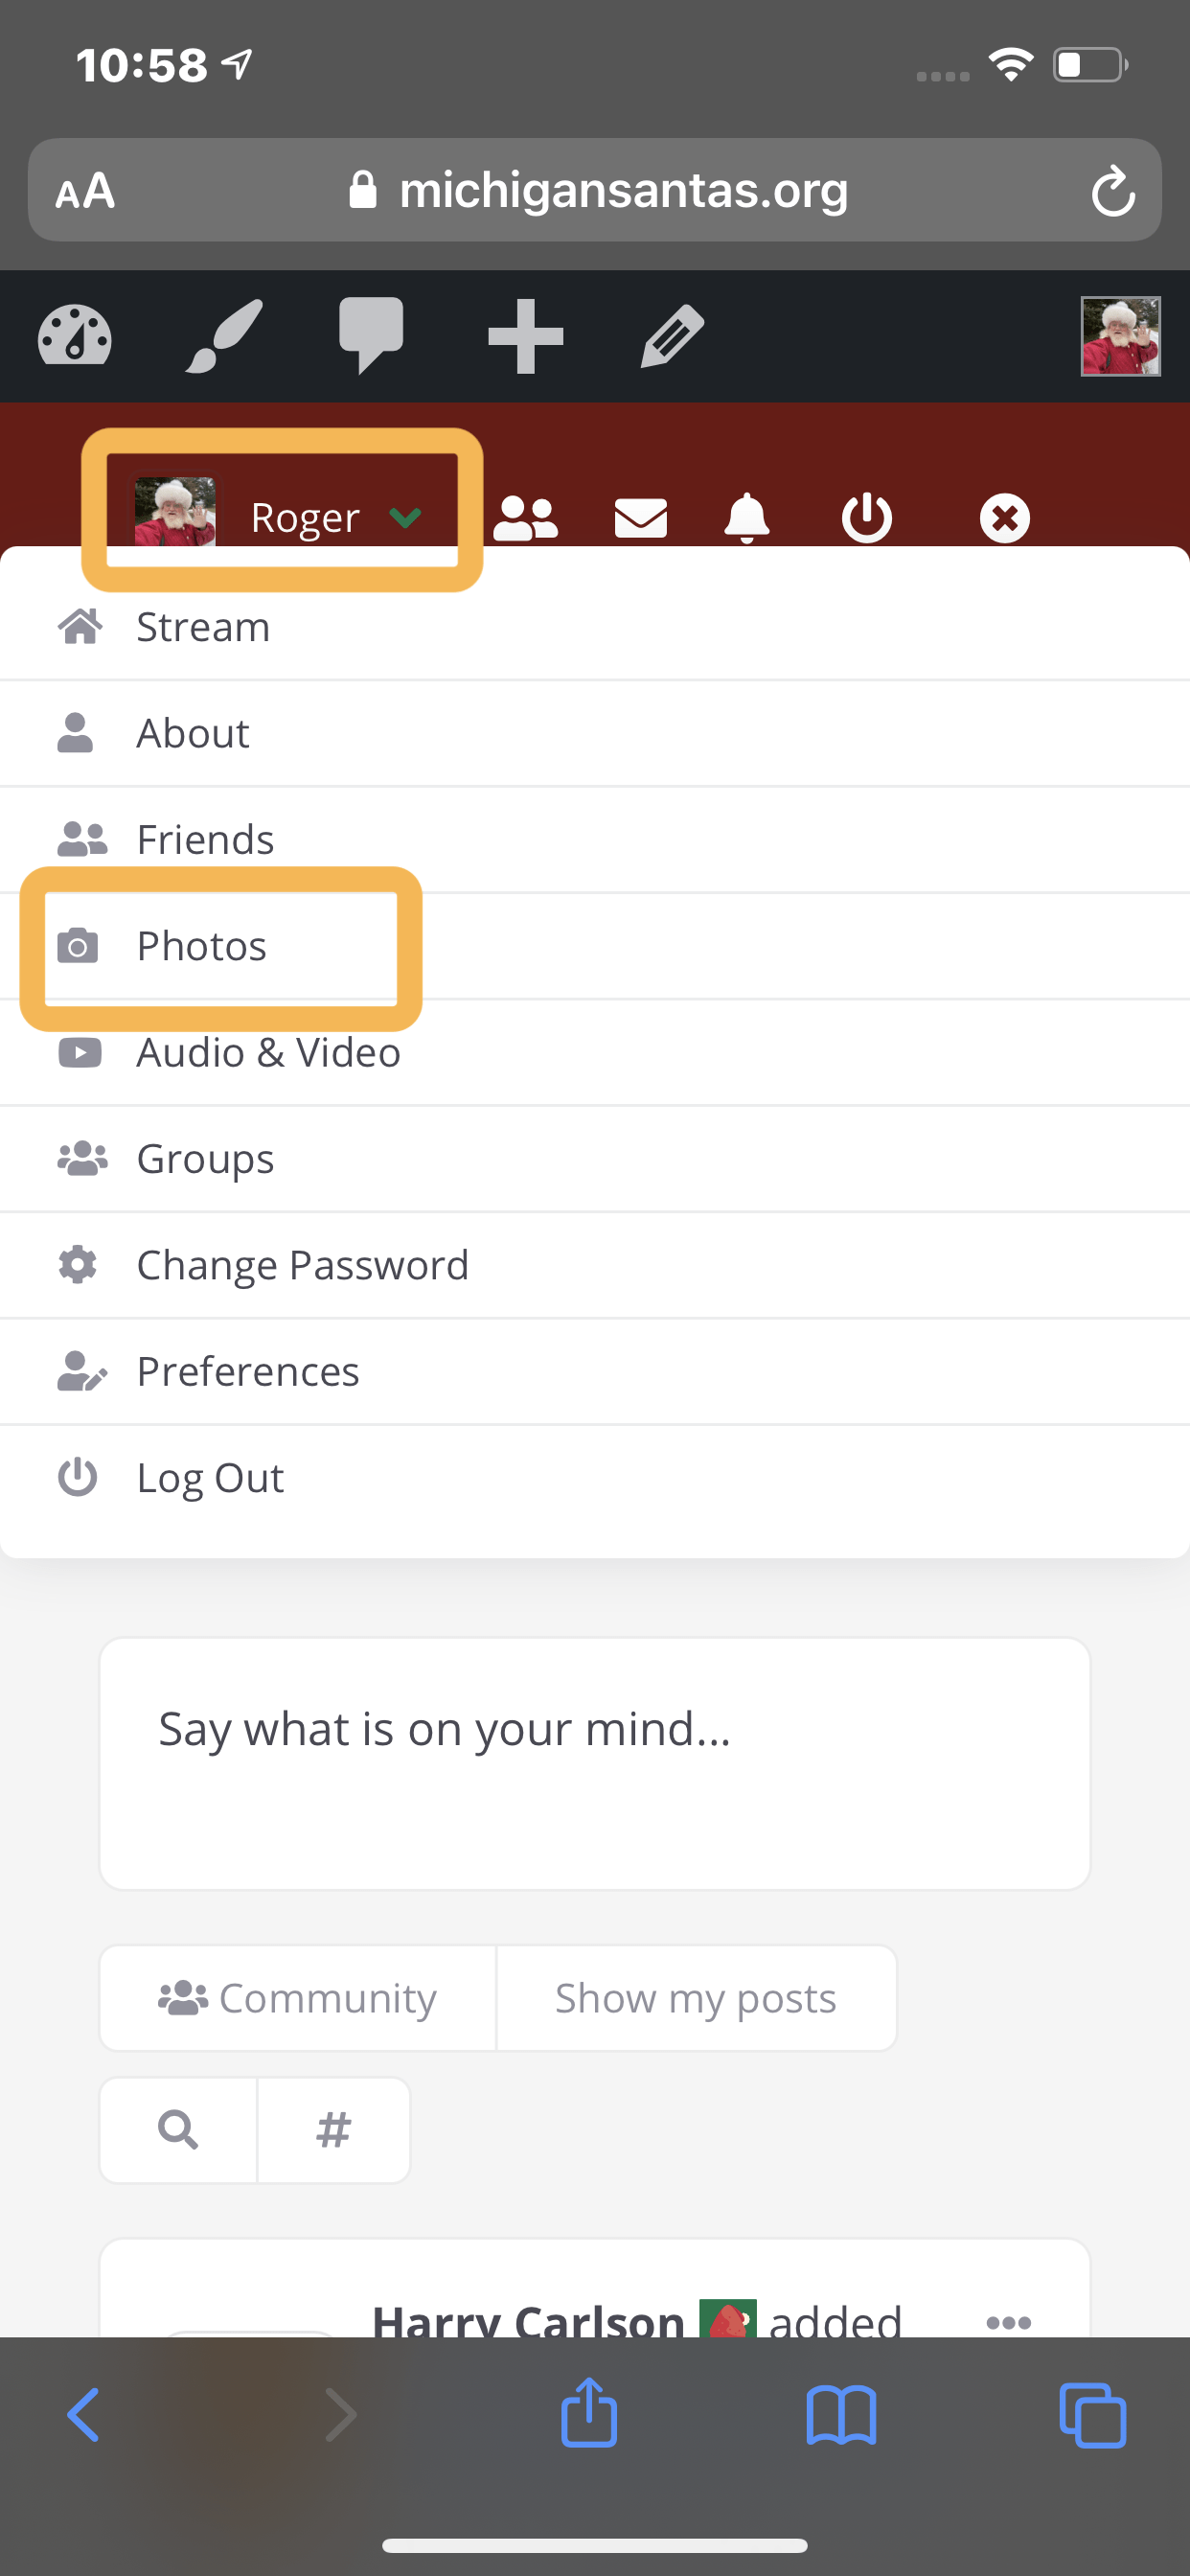
When you tap the “User Icon”, it will expand to a few more icons. Tap on the arrow next to your Name and Profile Photo.
This will open the profile menu and you will find a “Photos Link”. Tap on that link. (OUTLINED IN ORANGE)
Step 3 – Find your Photos
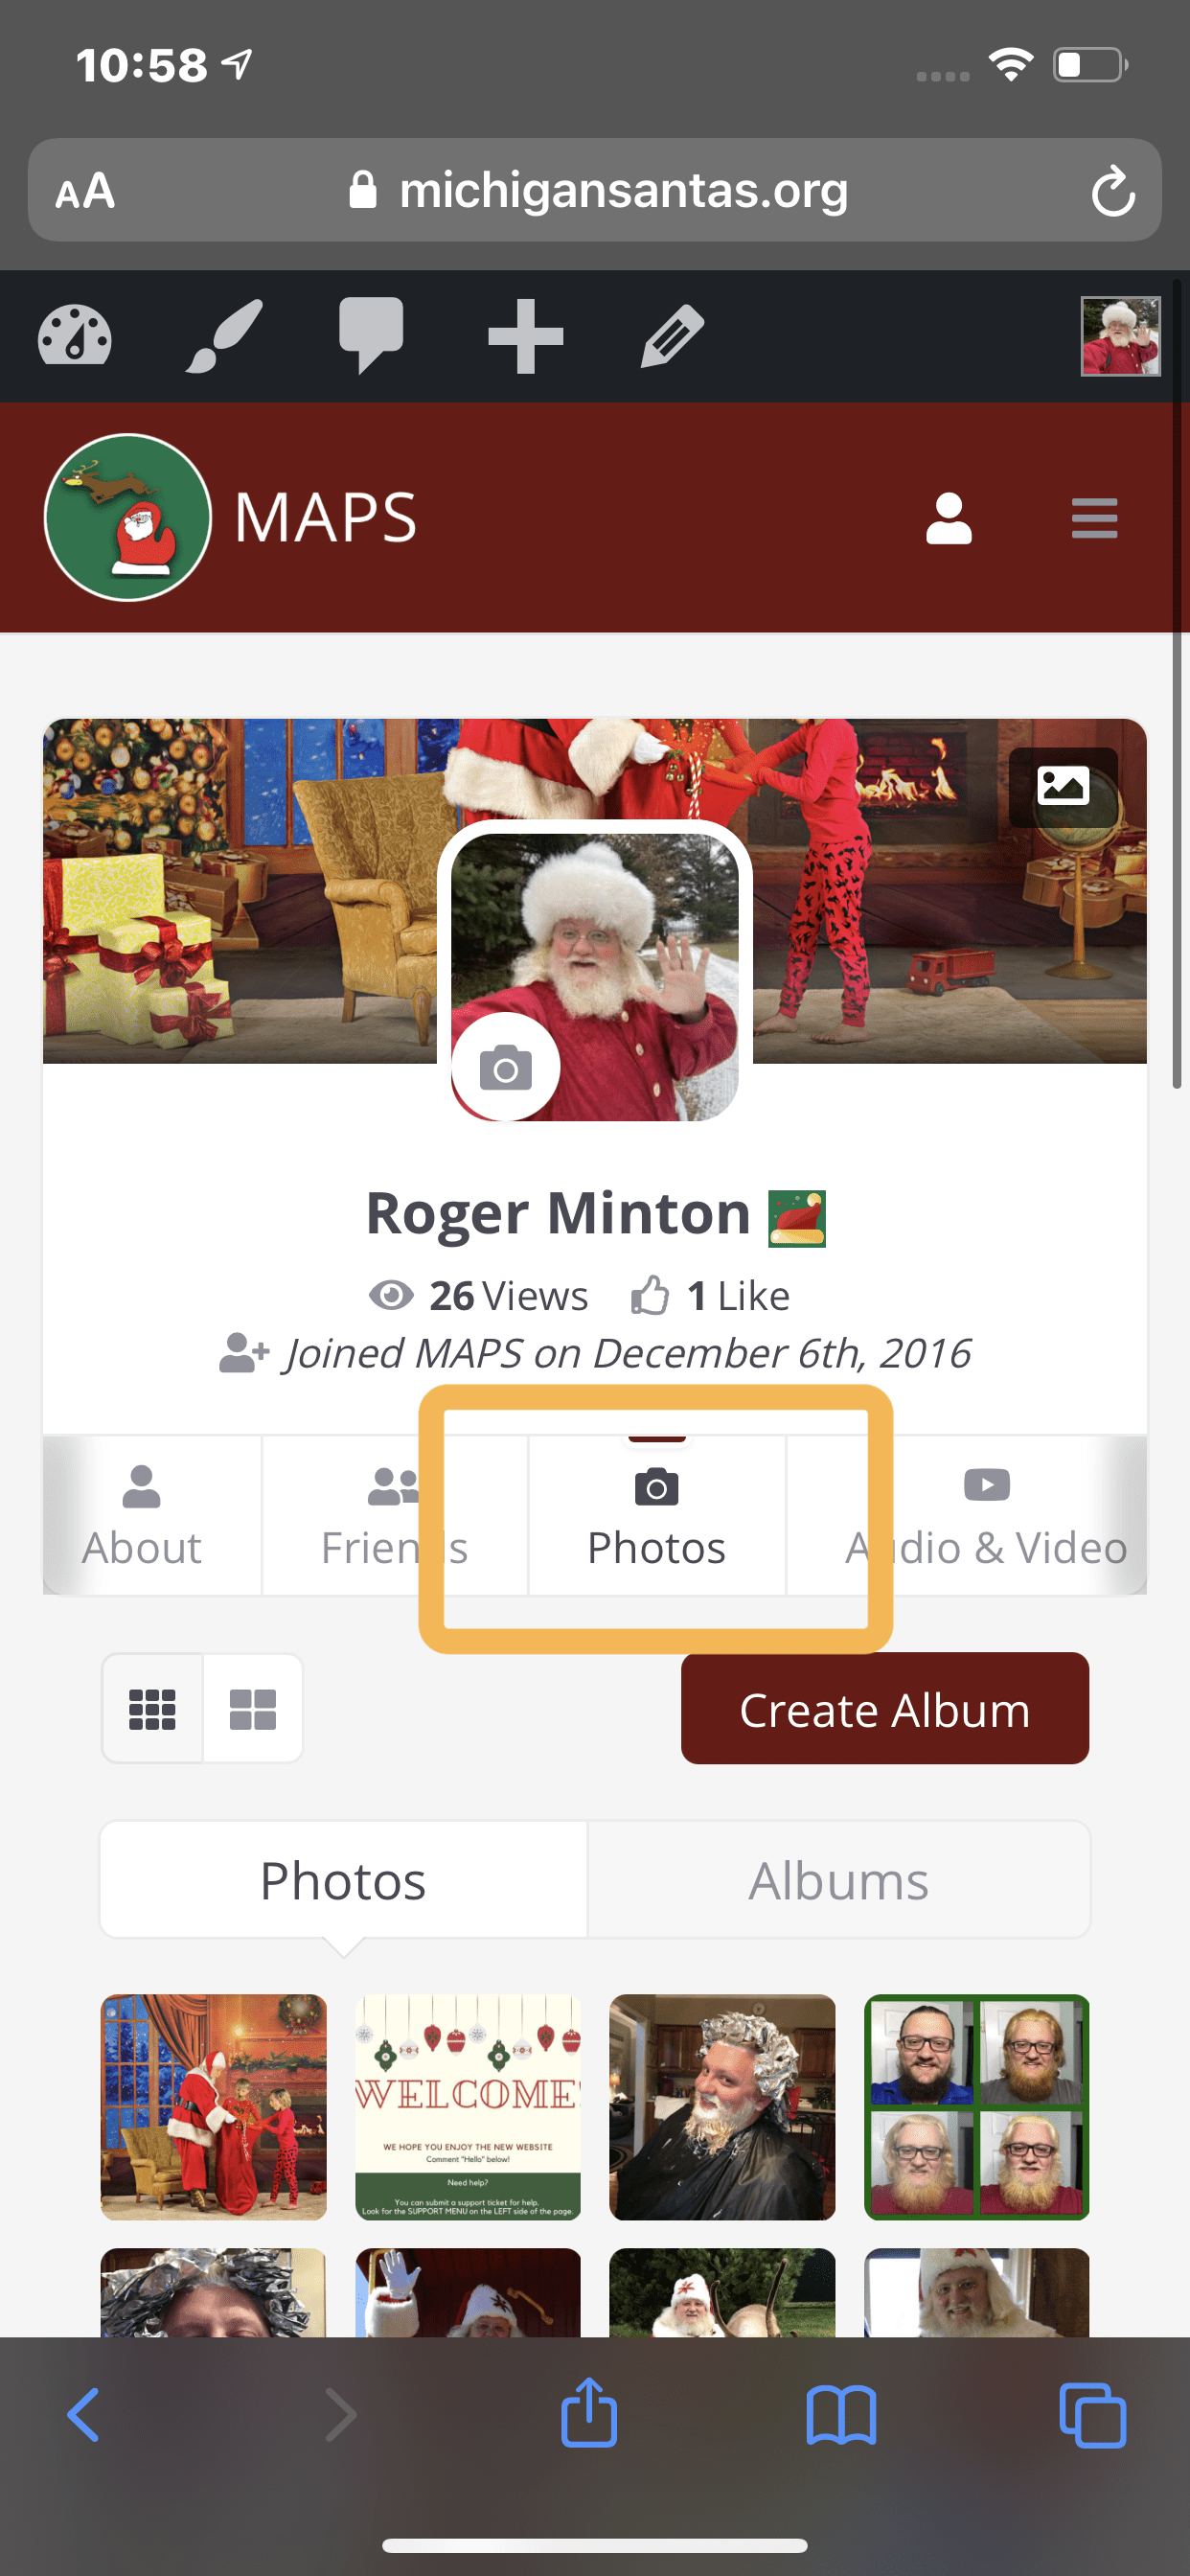
Navigate to your “Photos Tab” on your profile This link is outlined in ORANGE in the photo.
If you tapped your NAME from step one, you will be taken to your main profile, find the “Photos” link in the bar just below your name.
If you tapped the “Photos” link from step one, you will be taken to your photos tab.
Once your photos have loaded you can scroll down to find the photo you wish to delete. You can then tap the photo to view a larger version of the photo.
Step 4 – Access the edit menu on the photo
Once your Photo has shown up larger, you will want to tap the “Comments” (OUTLINED IN ORANGE) in the UPPER LEFT HAND CORNER.

Step 4a – Access the edit menu on the photo
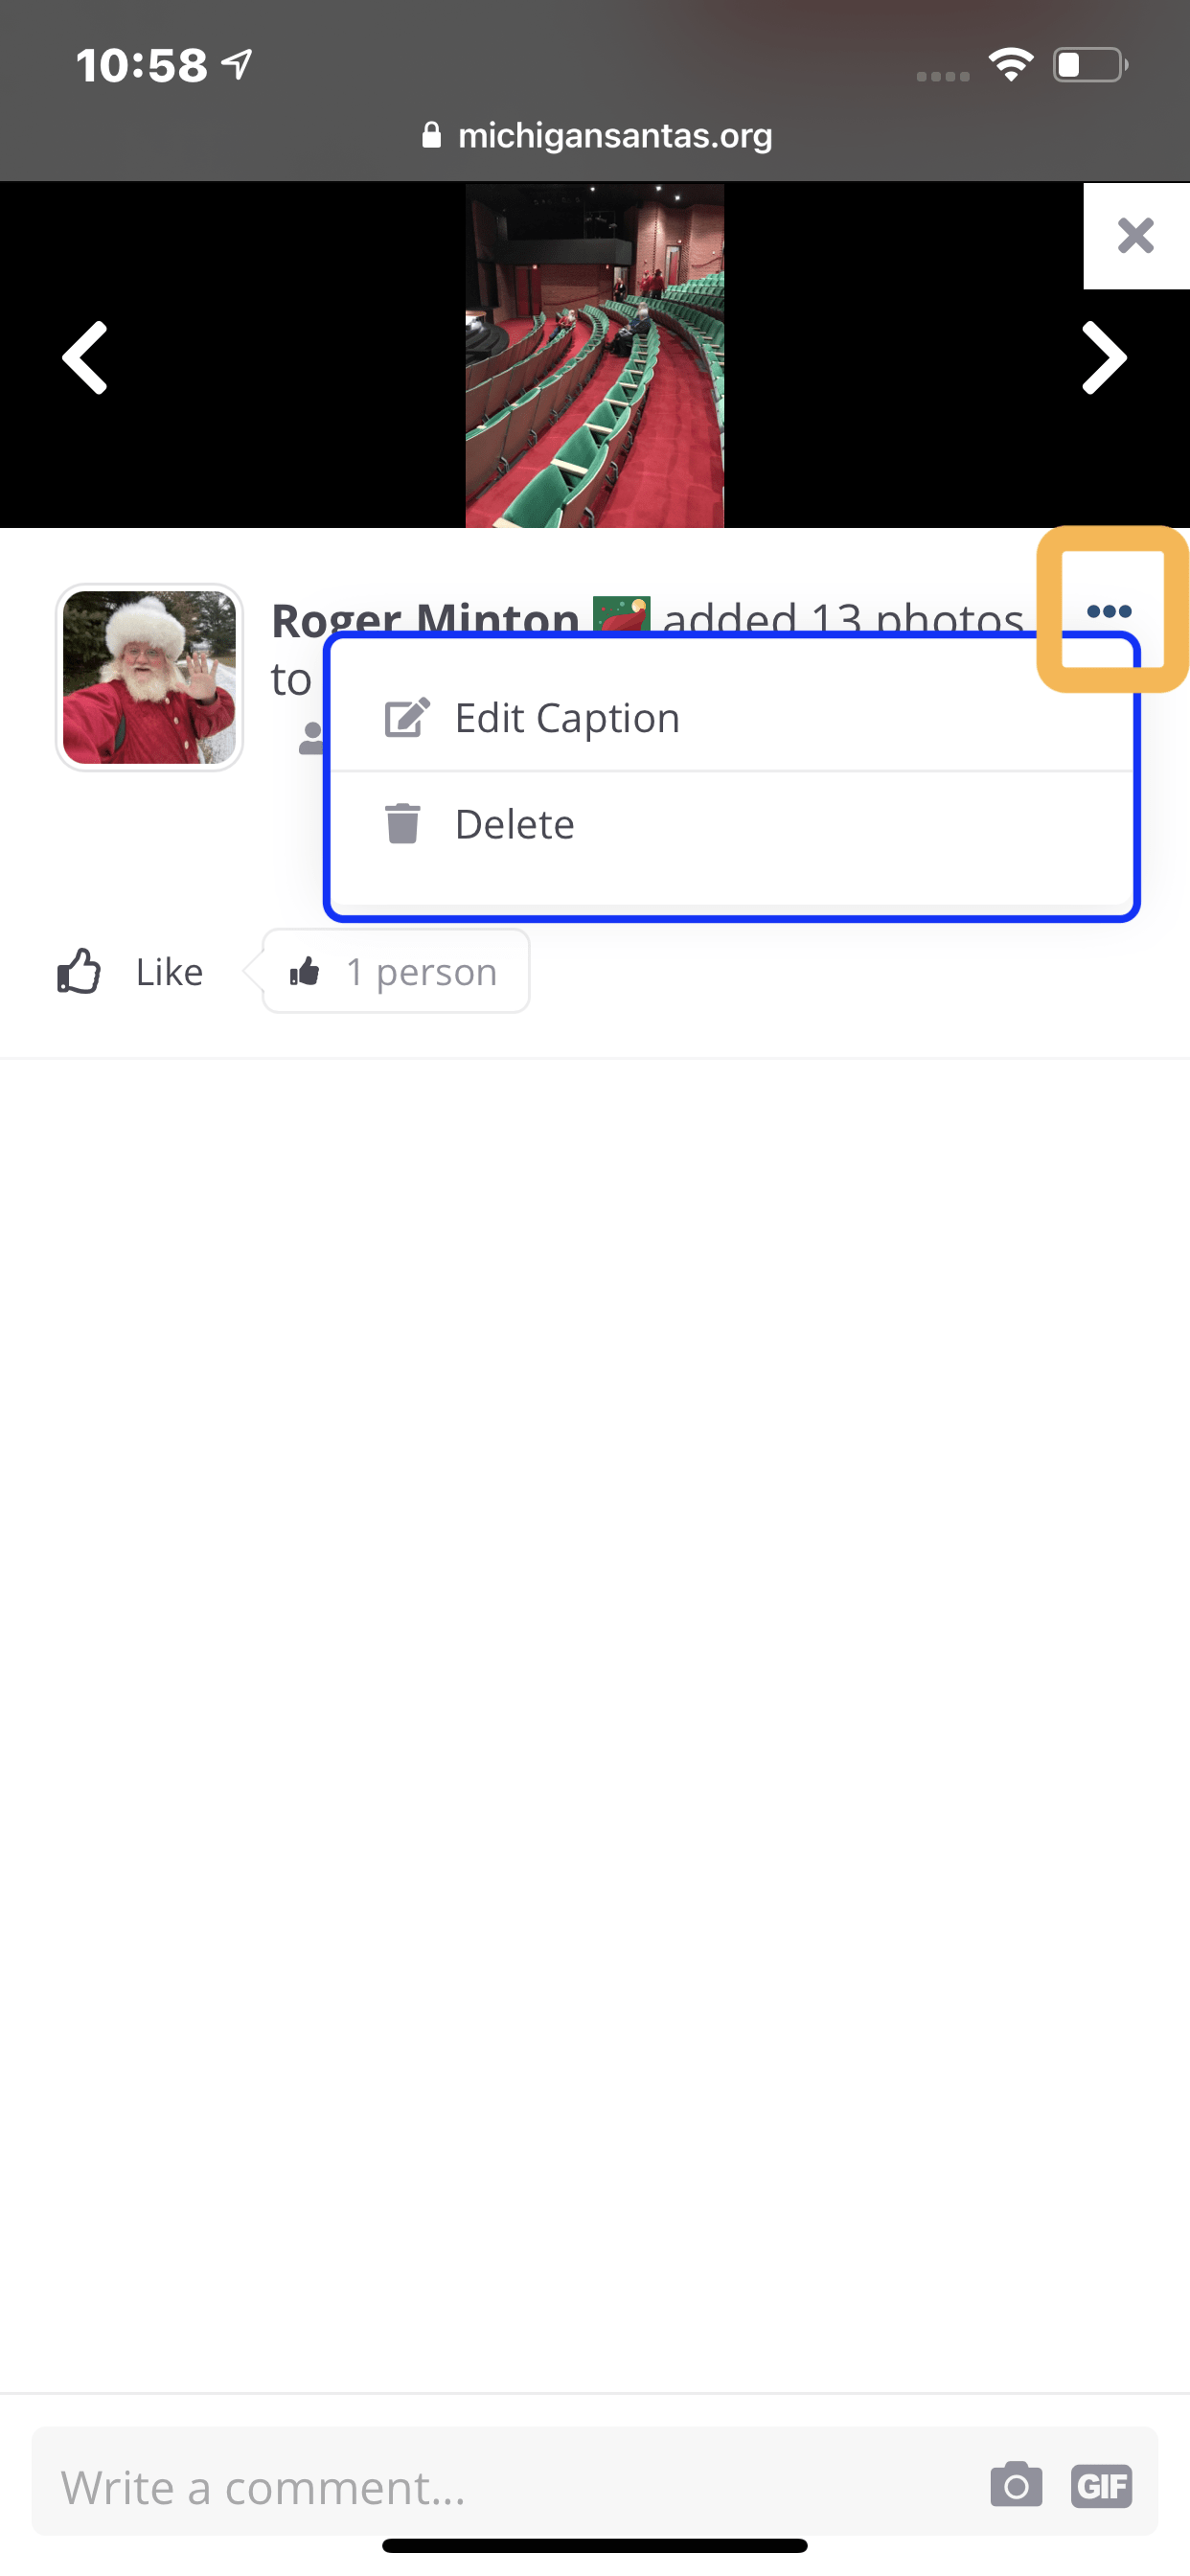
When the comments screen has shown up, find the Three Dots in the upper right hand corner of the image pop up (OUTLINED IN ORAGE). Click on those dots to access the edit menu.
From here you can click the “Delete” link (OUTLINED IN BLUE) to delete the photo.
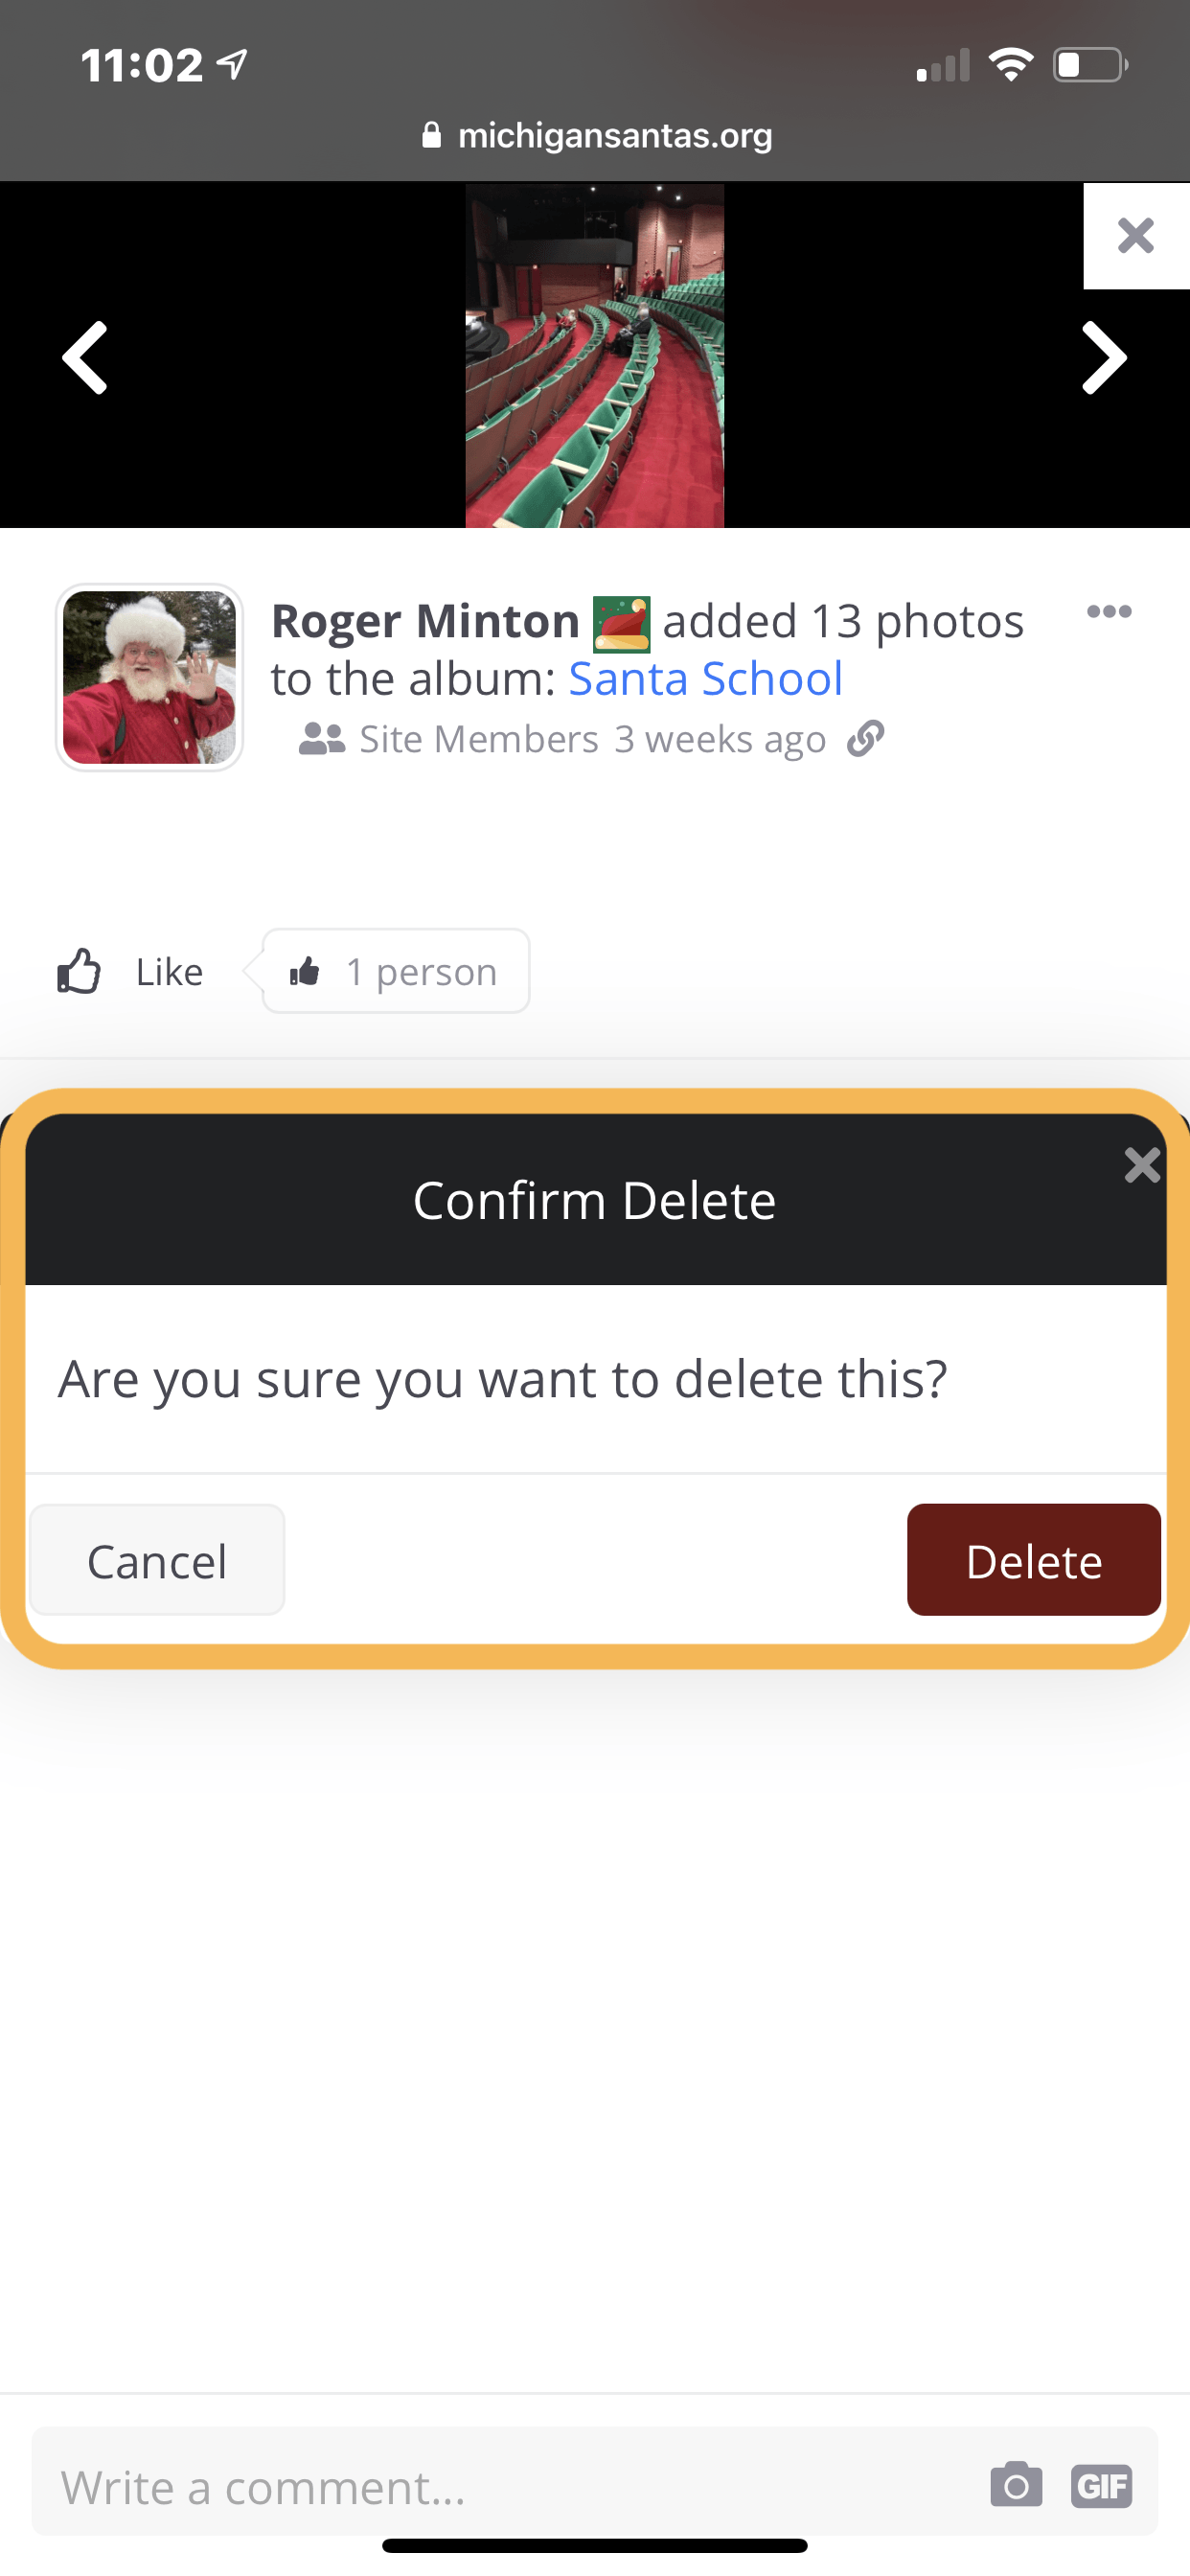
Step 5 – Confirm Deletion of the Photo
When you click delete link from the previous step, the system will ask you if you really want to delete the photo. Tap Delete to delete the photo.